
7 steps to apply guitar decals &
the benefits of using guitar decals.
Applying guitar decals is easy when you follow the instructions below. Here you will also learn the benefits of applying guitar decals, where to purchase guitar decals, how to customize guitar decals so they fit onto your instrument, and about how long it takes to put on guitar decals.
IMPORTANT. PLEASE READ BELOW
BEFORE ATTEMPTING THIS PROJECT.
First thing first about putting decals or stickers on guitars or ukuleles… here are the benefits…
1. Putting guitar decals or guitar stickers on will customize it, making the instrument totally yours.
2. As a result of putting decals and stickers on guitars or ukuleles that you own, this will give you more incentive to want to play them, simply because the instrument is now even more unique, beautiful, and just simply cooler than ever to you.
3. This all could inspire you to practice more, to perform better, to want to become a better musician; becoming more proficient on your instrument, and more comfortable performing.
As musicians this is simply what we all should be striving for always. To become the best players that we can be, and to have the most fun possible in the process. If putting decals on guitars and ukuleles can help you accomplish those goals. Good For You! Go For It!
Here are the 7 Steps to applying Guitar Decals
There are 7 steps to applying guitar decals (or on a ukulele) that will take about 15 to 20 minutes or longer, depending on how many decals that you want to put on your instrument. This definitely is a task that you do not want to rush though. If you rush, you’re going to risk ripping the decal. Please trust me on this. Go slow, and be patient. The total cost of the project will vary depending on how many decals you purchase and where you purchase them from. The decals that I used on my ukulele for this project were purchased at amazon.com and also on ebay.com Before you proceed please read through all of the steps below before attempting to put decals on guitars. This advice is for your own benefit so you know ahead of time whether or not this project is something that you can accomplish on your own or if you should instead have someone else complete this task for you. Lastly, under the instructions below there are also some tips that I’ve discovered when applying decals to my ukulele that I thought might be helpful to you also. Be sure to check these out before you purchase any decals. They might be helpful when you plan how to decorate your instrument and what decals to purchase also. Good luck on the project and I hope the advice here helps you!
-Chrit
Project Objective: To put decals on your guitar or ukulele
Estimated time to complete task: 15-20 minutes or longer. This all will depend on how many decals that you want to put on your guitar or ukulele.
Total cost of project: varies depending on how many decals you purchase.
7 steps to putting decals on guitars
Step 1- Wash your hands. Make sure they are clean and totally dry. This is important in preparation of step 6 below when putting decals on guitars.
Step 2- To customize the look of your instruments when putting decals on guitars. Locate on the instrument where you want to place the decal and if necessary use a pair of scissors to trim the decal to shape where you want to place it on your instrument.
Step 3- Before you begin putting decals on guitars. Make sure the area where you want to place the decal is clean. When I put decals on my ukulele I didn’t wash the instrument as if it were a window, however I did wipe the area with a towel or dry rag just to be sure that there was no dust or anything on the surface.
Step 4- Prepare the decal to be applied to your instrument by rubbing a credit card across the clear transfer tape. This step is to help remove any air bubbles that may have formed causing the sticker to cling to the transfer tape.
Step 5- Slowly peel the white paper backing off the sticker. If the decal sticker clings to the backing slowly replace the white paper backing and repeat step 4 to continue putting decals on guitars
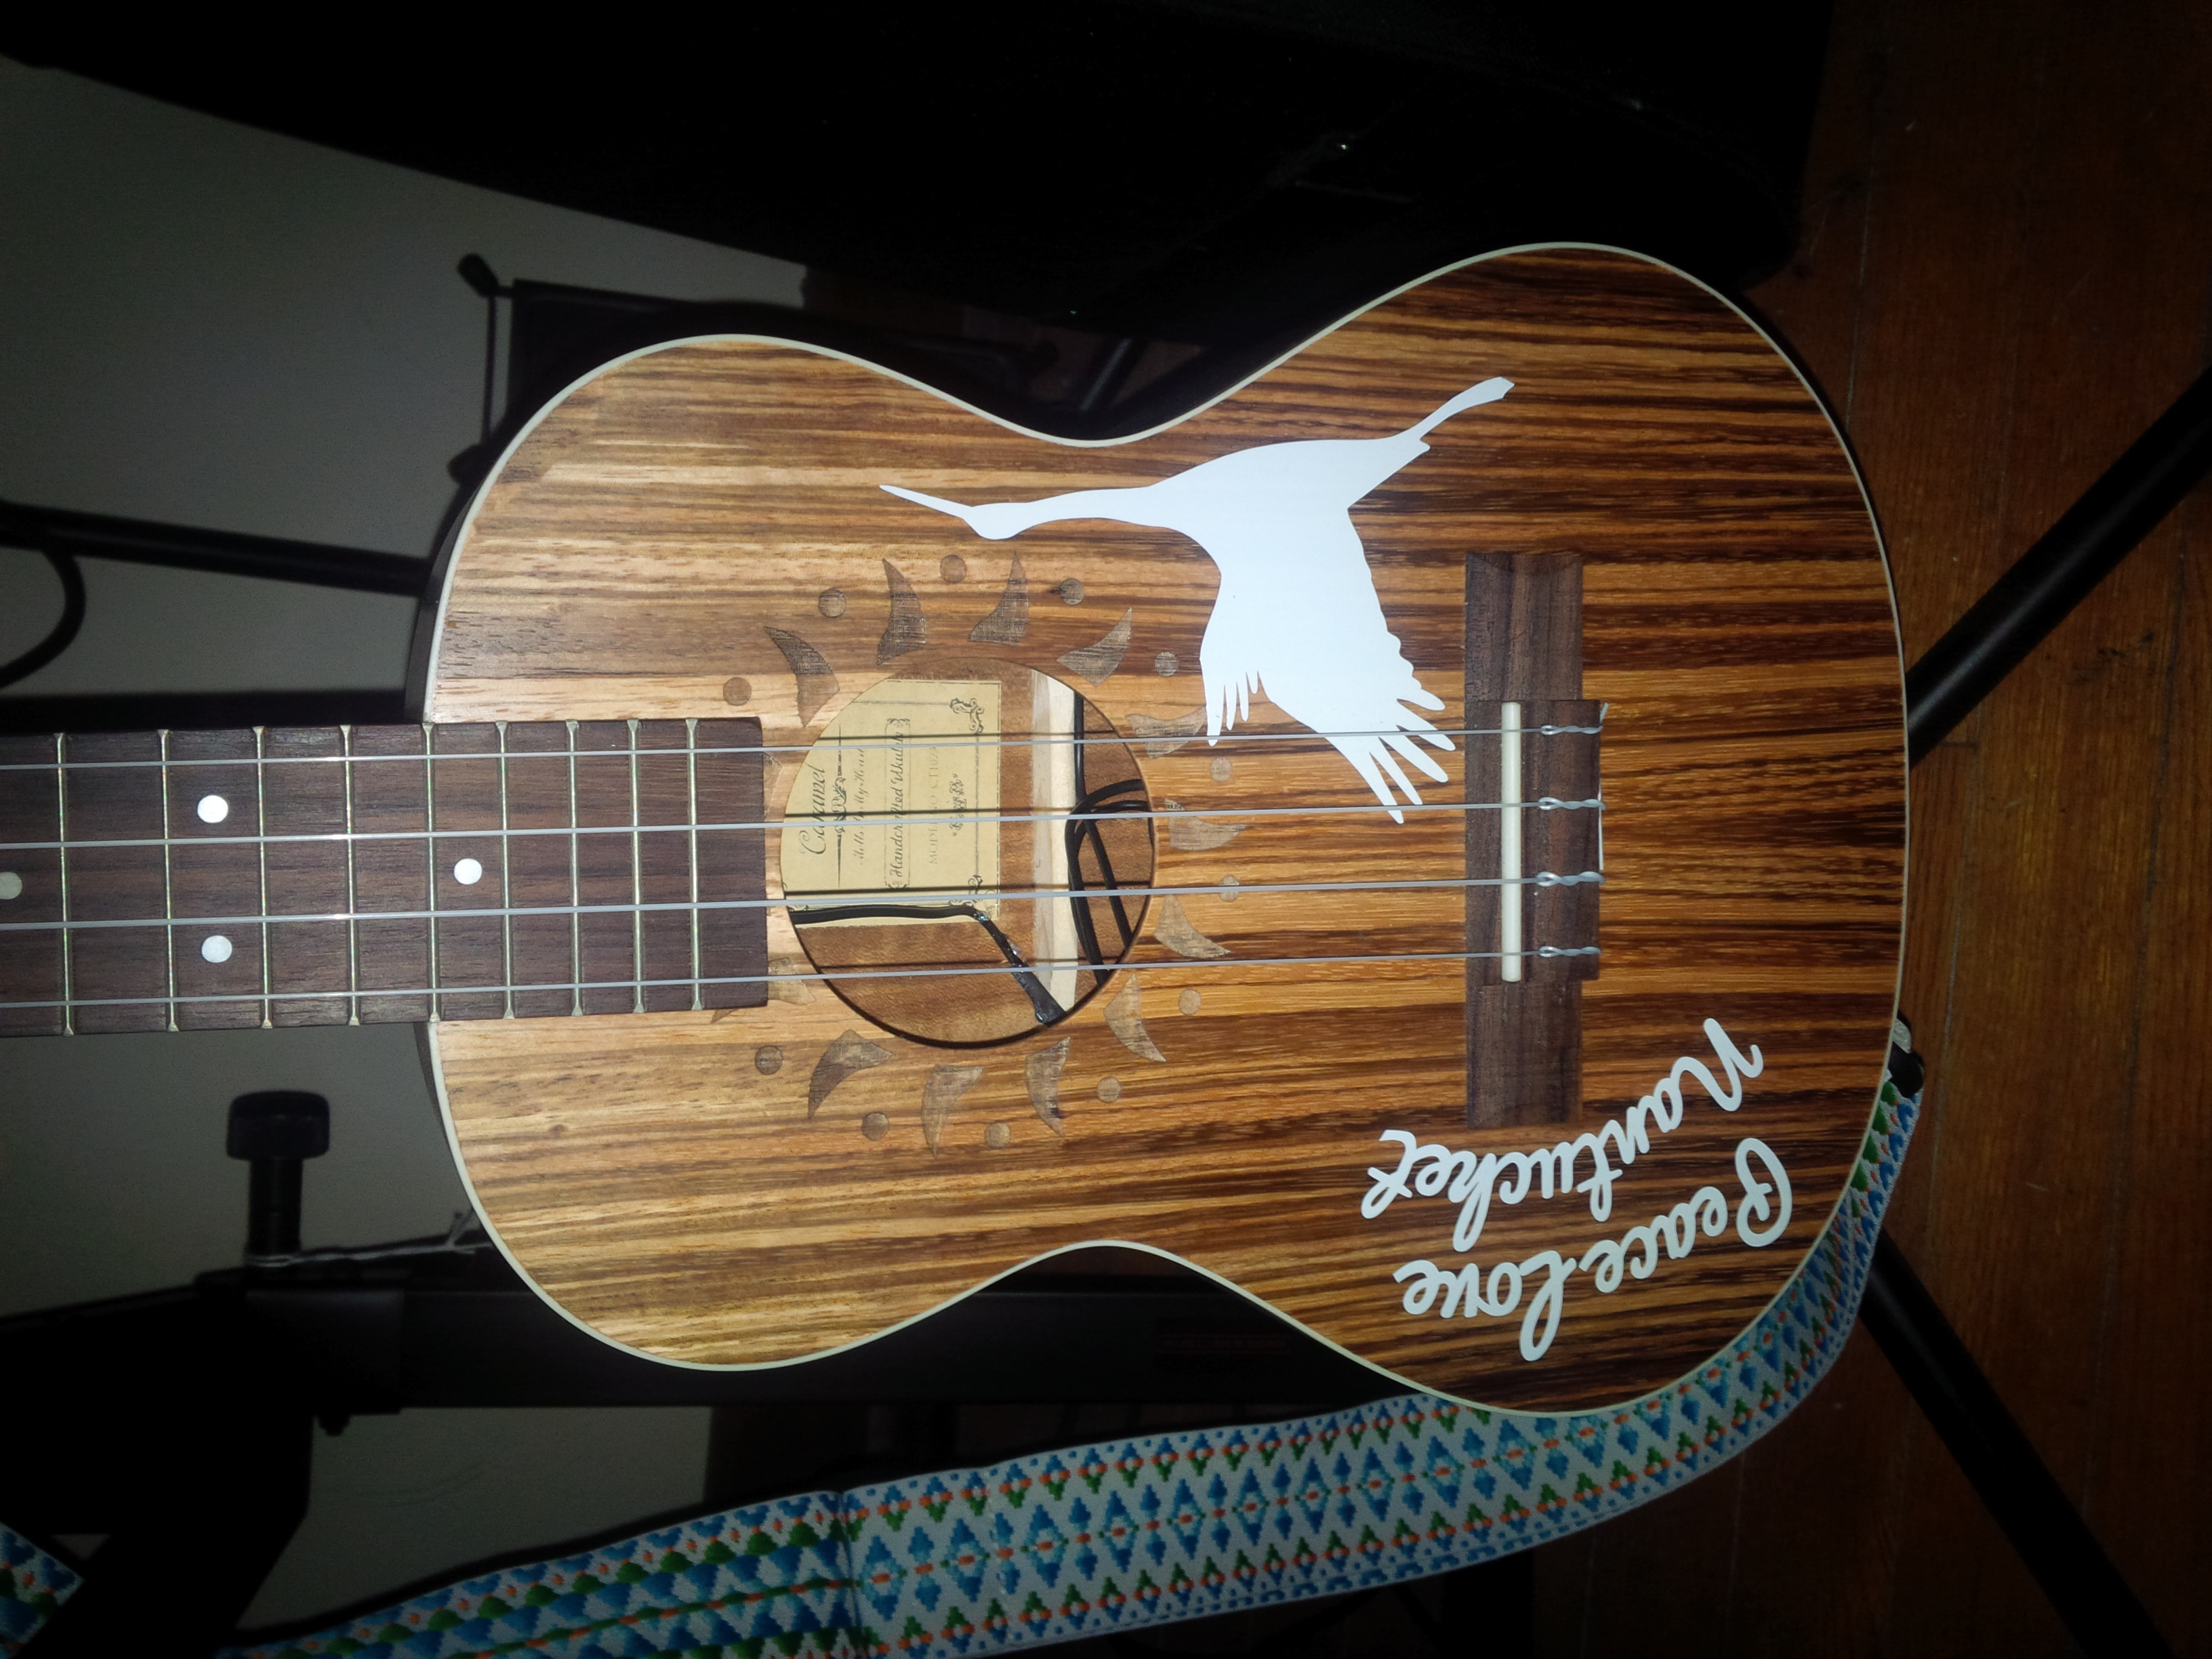
Step 6- Slowly and carefully lower the decal sticker onto the instrument’s surface and gently press it in place with your fingertips or credit card. For this step I used my fingertips because some of the shapes of the decals that I used were small and I didn’t want to risk tearing the decal by using a credit card. This is also why I recommend in step 1 above to wash and dry your hands well before you begin putting decals on your guitar and ukulele. Below I have pictures of the decals that I placed on the front and back of my ukulele. You’ll notice on the front, the placement and location of the Stork decal is very specific and fits well. I had to trim the original decal so it fit to size properly in this location. Before moving onto the next step I would recommend waiting at least 10 minutes. You might need longer depending on the decal, your instrument, how clean the instrument is, and the material or company that made the decal.
Step 7- Slowly peel the clear transfer tape off at an angle. Be careful not to pull the sticker off the surface. If the sticker peels away from the surface you need to repeat step 6 above. I had this problem when placing the white Stork decal on the front of my ukulele, and also the green Stork decal on the back of the ukulele. In pictures 1 and 2 below you’ll notice that both of these decals have some very small features, specifically the legs and feet of the birds. At first when I went to peel the clear transfer tape off, the legs and feet had not adhered to the surface yet. To fix this problem I slowly lowered the decal back into place. Gently pressed the decal back to the surface and waited another 10 minutes or so before attempting step 7 again. After attempting step 7 a second time, the decals were attached to the surface of the ukulele fine, and I was able to completely peel off the clear transfer tape from the decals.
Picture 1.

Picture 2.
Last minute help TIPS before you purchase can help you when putting decals on guitars.
- Decals can be trimmed down. Even if you see part of a decal that you like and want on your instrument. If there’s enough space you can trim the decal down to fit onto your instrument so it is customized to your liking. In picture 1 and 2 above. The phrase “Peace Love Nantucket” on the front of the ukulele was actually part of a larger decal that I purchased. I simply cut the larger decal so I could fit the phrase in the spot that I wanted on the front of the ukulele as shown in picture 1. The remainder of the original larger decal is actually the “Surf Rider” decal that you see on the back in picture 2. I placed this on the back simply because I had the space, I didn’t want to throw away the rest of the decal, and also I liked the look of the white decal on the zebra wood.
- Sometimes the size of the decal is not what you expect when you order it. This happened to me when I ordered the anchor decal. This was originally was supposed to go onto the front of the ukulele, however when I received the decal it was not exactly what I was expecting. It was too large for the front of the ukulele so I placed it on the back instead.
- Be careful and patient when applying the decals. You really do have to make sure that you wait long enough before you peel away the clear transfer tape. I had this problem when I was trying to apply the two Stork decals as I mentioned in Step 7 above.
HOPE THIS HELPS!
Rock On,
-Chrit